Lets code a plain JavaScript notification queue using private fields and methods
Defining easy-to-use APIs can be tricky, a good starting point is to keep a small exposed surface. Now as private fields are becoming available, let try them out.
When creating modules and defining their API the tricky part is often to expose as few parts as possible but still enough to allow for some flexibility for how the module can be used. In this tutorial, we are going to create a notification queue that will keep track of the order in the notifications where added as well as each notification message and level.
As the last part, we will also add a basic plain JavaScript function to render the notifications as they are emitted to show how we can separate the queues logic from the rendering view in a nice way.
This i how the final code will work:
Lets start off with sketching the API:
class Notification extends Event {
  level;       // Getter enum ['info', 'warning', 'error']
  message;     // Getter string
  dismissed;   // Promise that resolves when the notification is dismissed
  dismiss() {} // Method that will dismiss the notification
}

class NotificationQueue extends EventTarget {
  add(notification) {} // Method for adding new notifications to the queue
}
In addition to this, the NotificationQueue will dispatch a Notification event object (with event name "notification") at a time until the queue is empty.
The user interface can listen to these events and render the notifications. The tricky part here is that there may be several different ways in how we would want to dismiss the notifications and we do want to leave all those decisions to the user interface to keep the separation of concerns. There may be buttons to dismiss the notification or timers and how we want to render them should be up to the user interface.
Let's assume that we will have a function called renderNotification(notification) that will take one notification and render and bind to its method dismiss in whatever way makes sense.
This means that we now have three components:
- Notification - The event object that carries the level, message, and a mutable dismissed state.
- NotificationQueue - An object where notifications can be added, and that will dispatch them in order one at a time as soon as there are any events available.
- renderNotification - A function that takes a Notification event object and renders it in the user interface, it will also handle any actions that can dismiss the notification.
Nice, now we can jump over to implementing the Notification and the NotificationQueue.
As private fields and private methods starts becoming available in several browsers now (hoping that Firefox will follow soon as well), these features provides a perfect fit for classes we are going to create. Now we can keep the internal state hidden and only expose the parts that the users of this module should interact with.
Let's have a look at the implementations:
notification.js
export class Notification extends Event {
  static #ALLOWED_LEVELS = ['info', 'warning', 'error'];
  #message = '';
  #level = '';
  #dismissed;
  #dismissResolve;

  get message() {
    return this.#message;
  }

  get level() {
    return this.#level;
  }

  get dismissed() {
    return this.#dismissed;
  }

  constructor(message = '', level = 'info') {
    super('notification');

    if (!this.constructor.#ALLOWED_LEVELS.includes(level)) {
      throw new Error(`Level ${level} is not allowed, must be one of ${this.#ALLOWED_LEVELS.join(', ')}`);
    }

    this.#message = message;
    this.#level = level;

    this.#dismissed = new Promise((resolve) => this.#dismissResolve = resolve);
  }

  dismiss() {
    this.#dismissResolve();
  }
}

export class NotificationQueue extends EventTarget {
  #queue = new Set();
  #current;

  add(notification) {
    if (!(notification instanceof Notification)) {
      throw new Error('Argument must be an instance of Notification');
    }

    this.#queue.add(notification);

    if (!this.#current) {
      this.#next();
    }
  }

  async #next() {
    this.#current = this.#queue[Symbol.iterator]().next().value;
    if (this.#current) {
      this.#queue.delete(this.#current);
      this.dispatchEvent(this.#current);
      await this.#current.dismissed;
      this.#next();
    }
  }
}
By declaring #message, #level and #dismissed and only making them accessible via getters we can ensure that they will not be tampered with, and thus reducing possible bugs and misuses. Once a Notification is created and it passes the validation in the constructor the only part that can change is the dismissed state. The Notification then lets itself be dismissed when the dismiss method is ran and the NotificationQueue can bind to the exposed promise to know when to dispatch the next Notification.
The NotificationQueue only exposes add, and since that and the notification dismiss methods are the only ways to manipulate the queue the complexity is greatly reduced compared to if we would have more methods like delete, insertBefore, and so on. Keep it simple and then the API could grow if need in the future.
Inside the NotificationQueue there is a private Set that keeps the order of the notifications and also ensures that the same Notification will not be added more than once. If this was a more complicated queue you could imagine possibilities to bump notifications to the font of the queue, priority depending on the level, and so on, but those things would be added later if needed.
Finally, there is a #next method that picks the next Notification from the queue if available and sets it as the current one, dispatches an event, and then waits until that one is dismissed before repeating for as long as the queue is not empty.
Now let's create our render function.
render-notification.js
We construct a visual card with an icon, text, background color, and a close button in the top right corner. We then bind the close button and set a timer for 7 seconds. Whichever happens first of the click or the timer will run notification.dismiss() and then detach itself from the DOM so that it can be garbage collected.
There are many ways to create graphical components, the more framework heavy and my current Web Component favorite library LitElement, and you could choose whatever fit your needs. This example however shows how you might not always need a large framework to create modularized code with small interfaces, and sometimes it's easier to encapsulate mutable state and keep API surface down if you focus more on the features and less on which framework to use.
Okay, here comes the render function:
// Replace this with your favorite way of rendering HTML/CSS and
// run notification.dismiss() when you remove the element to
// notify the queue
export function renderNotification(notification) {
  const levels = {
    info: {
      icon: 'ⓘ',
      color: '#5b79de'
    },
    warning: {
      icon: '⚠',
      color: '#f0ad4e'
    },
    error: {
      icon: '⛔',
      color: '#d9534f'
    }
  };

  // Create notification element
  const icon = document.createElement('span');
  icon.textContent = levels[notification.level].icon;
  icon.style.color = '#fff';
  icon.style.lineHeight = '1.2';

  const message = document.createElement('span');
  message.textContent = notification.message;
  message.style.color = '#fff';

  const button = document.createElement('button');
  button.textContent = '×';
  button.style.color = '#fff';
  button.style.position = 'absolute';
  button.style.top = '0.2em';
  button.style.right = '0';
  button.style.border = 'none';
  button.style.background = 'none';
  button.style.cursor = 'pointer';

  const element = document.createElement('div');
  element.style.position = 'fixed';
  element.style.top = '1em';
  element.style.right = '-100%';
  element.style.transition = 'right 500ms ease-in-out';
  element.style.background = levels[notification.level].color;
  element.style.fontWeight = 'bold';
  element.style.borderRadius = '0.2em';
  element.style.boxShadow = '0 0.2em 0.3em #888';
  element.style.padding = '1em';
  element.style.display = 'grid';
  element.style.gridTemplateColumns = 'auto auto';
  element.style.gridGap = '0.5em';

  element.appendChild(icon);
  element.appendChild(message);
  element.appendChild(button);

  document.body.appendChild(element);

  // Animate element to visible
  setTimeout(() => element.style.right = '1em', 0);

  function close() {
    // Animate element
    element.style.transition = 'right 250ms ease-in-out';
    element.style.right = '-100%';

    // Remove element after animation
    setTimeout(() => {
      // If element was not removed already
      if (element.parentElement) {
        element.parentElement.removeChild(element);
        notification.dismiss();
      }
    }, 600);
  }

  // Close automatically after 7 seconds
  setTimeout(close, 7000);

  // Close on button click
  button.addEventListener('click', close, {once: true});
}
Now let's put this together!
index.html
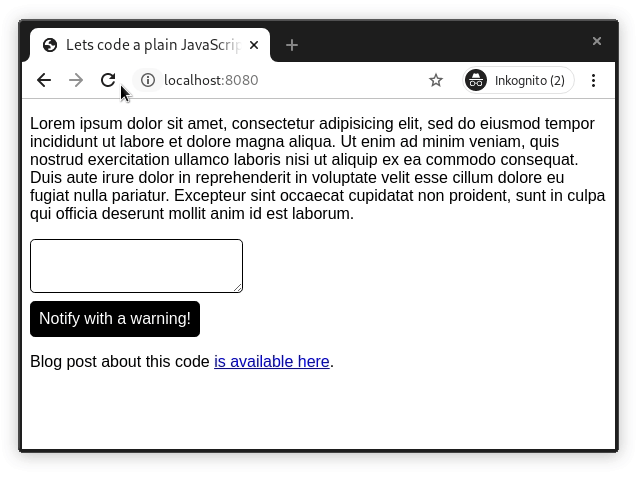
Below is our HTML page where we connect the three pieces, import the modules, hook them up and creates a few example use cases. I think this part speaks for it self pretty much:
<!DOCTYPE html>
<html lang="en" dir="ltr">
  <head>
    <meta charset="utf-8">
    <title>Lets code a plain JavaScript notification queue using private fields and methods</title>
    <style>
      html, button, textarea {
        font-family: sans-serif;
        font-size: 16px;
      }

      textarea {
        display: block;
        margin-bottom: 0.5em;
      }

      textarea, button {
        border: 1px solid #000;
        background: #fff;
        padding: 0.5em;
      }
    </style>
  </head>
  <body>
    <p>
        Lorem ipsum dolor sit amet, consectetur adipisicing elit, sed do eiusmod tempor incididunt
        ut labore et dolore magna aliqua. Ut enim ad minim veniam, quis nostrud exercitation ullamco
        laboris nisi ut aliquip ex ea commodo consequat. Duis aute irure dolor in reprehenderit in
        voluptate velit esse cillum dolore eu fugiat nulla pariatur. Excepteur sint occaecat
        cupidatat non proident, sunt in culpa qui officia deserunt mollit anim id est laborum.
    </p>
    <textarea id="message"></textarea>
    <button id="notify" type="button">Notify with a warning!</button>

    <script type="module">
      import {Notification, NotificationQueue} from './notification.js';
      import {renderNotification} from './render-notification.js';

      // Create a new notification queue
      const queue = new NotificationQueue();

      // Bind an HTML render function for your handler
      queue.addEventListener('notification', renderNotification);

      // Add a notification
      queue.add(new Notification('Try filling in the texarea and clicking the button'));

      // Add an asynchronous error notification
      setTimeout(
        () => queue.add(new Notification('This a notification added with a timeout', 'error')),
        20000
      );

      // Listen for new notification submissions
      document.querySelector('#notify').addEventListener('click', () => {
        // Get message
        const field = document.querySelector('#message');
        const message = field.value;
        field.value = '';

        // Add message if not empty string
        if (message) {
          queue.add(new Notification(message, 'warning'));
        }
      });
    </script>
  </body>
</html>
There you have it, a notification queue in plain JavaScript without any external dependencies, the web platform has come a long way as is more accessible than ever before.
All the code is available on a repo with the longest name ever at GitHub.
Keep up the coding and don't you drown in the flood of frameworks now! :)